Table of Contents
- 1. Master Mobile Coffee Cart Power Requirements Guide
- 2. Plan Weather Contingency and Tent Protection
- 3. Implement Outdoor Catering Food Safety Standards
- 4. Design Efficient Beverage and Menu Travelability
- 5. Assemble Your Event Catering Equipment Checklist
- 6. Optimize Serving Staff Coordination and Guest Flow
- 7. Conduct a Thorough Venue Site Inspection and Load-In Planning
- Conclusion
Last Updated: August 19, 2026
1. Master Mobile Coffee Cart Power Requirements Guide
A mobile coffee cart’s power needs are non-negotiable. Commercial espresso machines draw 15-20 amps at startup, but most standard venue outlets are only 15 amps total. Your grinder, espresso machine, and hot water dispenser competing for the same circuit will trip breakers instantly. Understanding your power requirements ensures you arrive prepared instead of scrambling.
Step 1: Calculate Your Total Electrical Load
List every piece of equipment: espresso machine (3,000-4,000 watts), grinder (1,000-1,500 watts), refrigeration unit (500-800 watts), hot water dispenser (1,500-2,000 watts), and lighting or sound equipment. A full setup commonly totals 6,000-8,000 watts running simultaneously.
Step 2: Verify Venue Power Specifications
Contact your venue weeks ahead. Ask for amperage available, voltage (120V or 208V), outlet type, and electrical panel location. Many outdoor venues have limited power or restrict generator use entirely.
Step 3: Choose Your Power Solution
If venue power is adequate (dedicated 20-amp or higher circuit), bring heavy-duty outdoor-rated extension cords. If venue power is limited or unavailable, rent a portable generator. Quiet inverter generators (5,000-7,000 watts) eliminate noise issues at upscale events. For premium setups, consider silent mobile power stations, which eliminate both noise and fumes, critical for indoor or enclosed venues.
Colada Kulture Co. offers coffee trailers that can include built-in generator capability, removing dependency on venue power entirely. This flexibility matters when your event is in a high-rise with limited electrical access or a remote outdoor location.
Step 4: Test Equipment Before Load-In
Run a full power test at home. Fire up the espresso machine, grinder, and refrigeration simultaneously. This reveals whether your chosen power source handles real-world demand.
Bring a portable power meter to your venue site inspection. Measure actual available amperage at the outlet you’ll use. Venue staff often overestimate what’s available.
2. Plan Weather Contingency and Tent Protection
Weather doesn’t care about your event timeline. Rain, wind, and heat each create different operational challenges. An inclement weather plan separates professionals from unprepared operators.
Assess realistically: what weather conditions would shut you down? For coffee service, rain alone rarely stops operations. The real threats are high winds (which collapse canopies), extreme heat (which stresses refrigeration), or lightning (which makes operating electrical equipment dangerous).
Step 1: Secure Tent or Canopy Coverage
Rent a commercial-grade pop-up canopy (10×10 or 10×15 minimum) with sidewalls. Standard event canopies collapse in winds above 20 mph. Commercial models use heavier-duty frames rated for UV, water, and mildew resistance. Position your canopy to face away from prevailing wind direction and secure it with weighted bases or sandbags, not just the included legs.
Step 2: Create a Heat Management Strategy
Outdoor heat stresses refrigeration units and affects drink quality. If temperatures exceed 85°F, your coolers work harder and may fail to maintain safe food temperatures. Insulated food pan carriers maintain temperature for 5+ hours without electricity, providing backup cold storage. Position your cart in shade when possible and consider reflective tarps over equipment to reduce heat absorption.
Step 3: Develop a Rain Response Protocol
Create a written contingency plan: if rain begins, do you continue service under canopy cover or pause? If lightning threatens, do you shut down immediately? Communicate this plan to your client weeks ahead.
Operating electrical equipment during lightning storms is dangerous and often violates venue insurance requirements. If lightning is visible or thunder is audible, shut down immediately.
3. Implement Outdoor Catering Food Safety Standards
Food safety at outdoor events is stricter because temperature control is harder and contamination risks are higher. Hot food stays hot (above 140°F), cold food stays cold (below 40°F), and nothing sits in the danger zone (40-140°F) for more than 2 hours. Outdoor heat shrinks that window to 1 hour in temperatures above 90°F.
Step 1: Use Approved Holding Equipment
Transport hot beverages in insulated carriers designed for food service. Use commercial-grade coolers with ice for cold items, checking internal temperatures hourly with a food thermometer. Never assume venue refrigeration exists; bring your own cooler as backup.
Step 2: Establish Hand Washing and Sanitation Stations
Portable hand wash stations are non-negotiable. Your staff handles money, touches equipment, then handles cups and lids. Rent a commercial hand wash station with hot water, soap, and paper towels. Staff should wash hands every 30 minutes minimum and immediately after handling money. Bring sanitizing wipes for equipment and surfaces.
Step 3: Prevent Cross-Contamination
Use separate utensils, cutting boards, and surfaces for different menu items. If serving both dairy and and non-dairy options, use dedicated pitchers for each milk type. Label everything clearly and store raw ingredients separately from prepared items.
Step 4: Monitor Temperatures Throughout Service
Carry a food thermometer and check cooler temperatures every hour. If your hot beverage carrier drops below 140°F, switch to backup. Document checks on a simple log; this protects you if a guest later claims food poisoning.
4. Design Efficient Beverage and Menu Travelability
Menu travelability determines whether your coffee service runs smoothly or becomes a bottleneck. Complex drinks fail outdoors: layered beverages separate during transport, whipped cream melts in heat, specialty syrups crystallize in cold.
Step 1: Simplify Your Core Menu
Focus on drinks that travel well: espresso-based beverages (lattes, cappuccinos, americanos), cold brew, iced coffee, matcha lattes, and hot chocolate. These maintain quality during transport and outdoor service. Avoid specialty drinks with multiple components or fresh fruit garnishes.
Colada Kulture Co. builds menus around drinks that perform reliably in outdoor settings: espresso drinks with customizable milk options, cold brew that maintains flavor for hours, and seasonal specialties.
Step 2: Pre-Batch What You Can
Cold brew can be prepared days ahead and transported in bulk. Hot chocolate base can be prepared in advance and reheated on-site. Pre-batching reduces on-cart preparation time and improves consistency when serving 100+ guests.
Step 3: Organize Your Cart Layout for Efficiency
Position your espresso machine where baristas don’t reach across customers. Place milk steamers at elbow height. Store cups, lids, and sleeves within arm’s reach. Organize syrups and toppings in order of use. Poor cart layout creates bottlenecks.
Step 4: Establish a Service Flow
Decide whether you’ll take orders one customer at a time or batch orders (3-5 customers order, then you prepare all drinks together). Batch ordering moves lines faster but requires customers to wait for completion. Choose based on your guest count and event timeline.
For events with 100+ guests, batch ordering with a staging area prevents customers from blocking the service line. Guests order, pay, then wait at a pickup station while you prepare.
5. Assemble Your Event Catering Equipment Checklist
Success at outdoor events starts with a comprehensive equipment list. Missing items force improvisation, which leads to inconsistency, safety issues, or service delays.
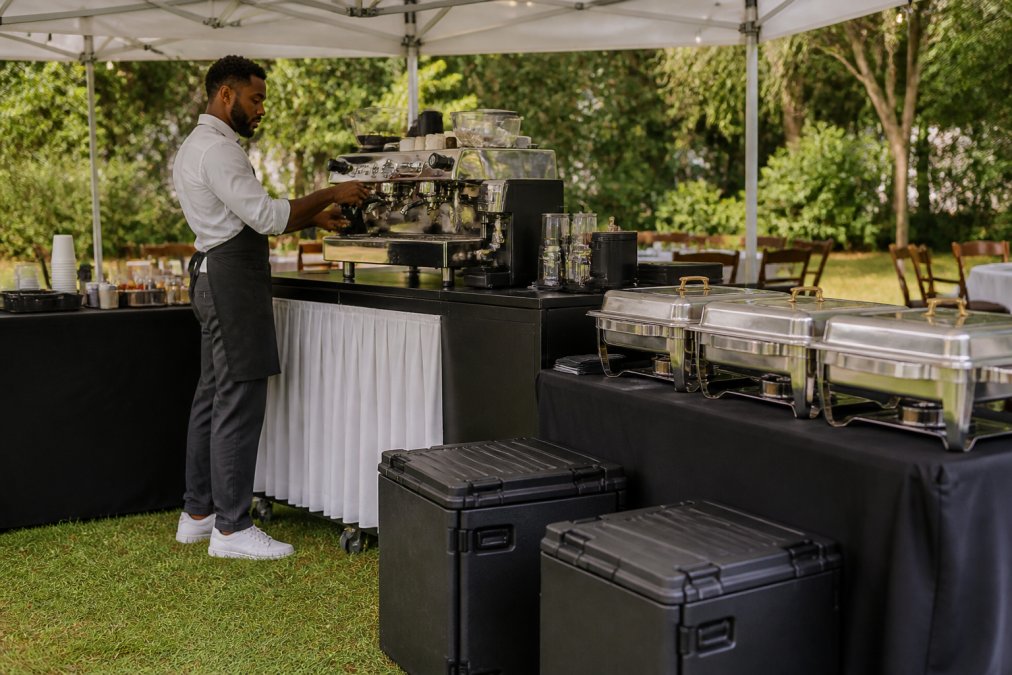
Essential Equipment Checklist:
- Espresso machine with grinder
- Hot water dispenser or kettle
- Milk steamer and pitcher
- Refrigerated cooler or insulated carriers for milk and cold items
- Portable hand wash station with hot water and soap
- Food thermometer for temperature checks
- Commercial-grade pop-up canopy (10×10 minimum) with sidewalls
- Heavy-duty extension cords (outdoor-rated, appropriate gauge for your power load)
- Power generator or portable power station (if venue power is unavailable)
- Insulated food pan carriers for hot items
- Coolers with ice for cold storage backup
- Cups, lids, sleeves, stirrers, napkins (order 20% extra)
- Milk options: whole, oat, almond (in appropriate volumes)
- Syrups, sweeteners, chocolate, and toppings
- Cleaning supplies: sanitizing wipes, towels, trash bags
- Cash box and payment processing device (if accepting cards)
- Signage or menu board
- Lighting for evening events (battery-powered or generator-powered)
- First aid kit
- Backup supplies for high-traffic items (extra cups, napkins, milk)
Quantity Planning:
For a 2-hour event with 100 guests, assume 60-70% will purchase a drink (60-70 beverages). Add 20% buffer for high-demand items and repeat customers.
Pre-Event Equipment Inspection:
Two days before the event, test every piece of equipment. Run your espresso machine through a full cycle. Check that your generator starts and provides stable power. Verify coolers maintain temperature. Test your hand wash station. Inspect canopy for damage.
6. Optimize Serving Staff Coordination and Guest Flow
Service quality depends entirely on staff coordination. Even with excellent equipment and menu design, poor staff communication creates bottlenecks and frustrated guests.
Step 1: Assign Clear Roles
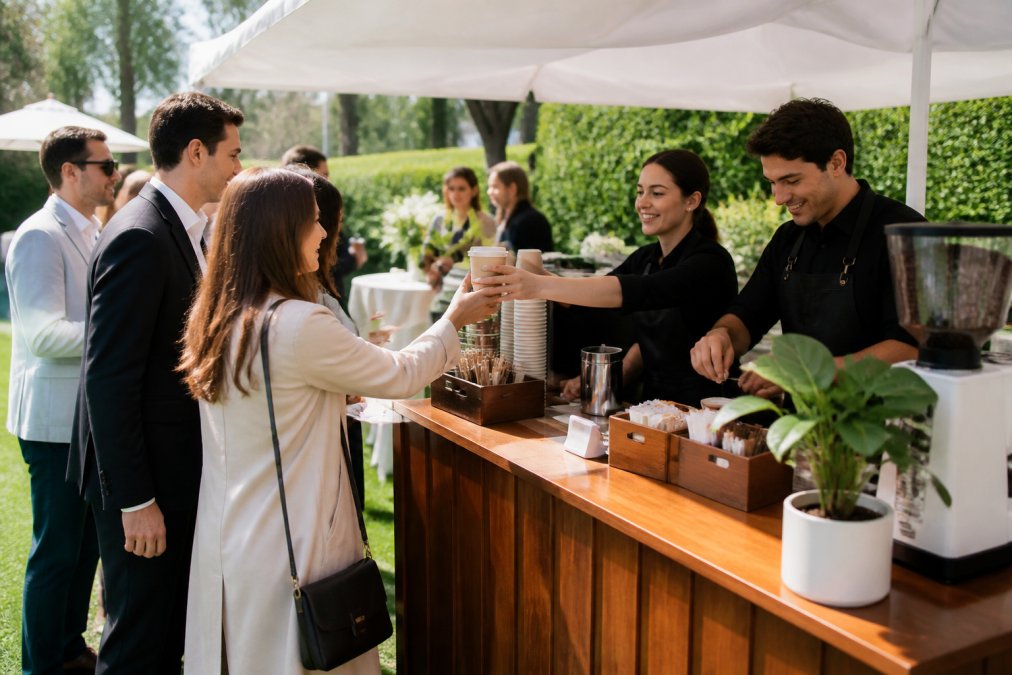
Define who does what: one barista prepares drinks, one handles payment and orders, one manages supplies and restocking. For larger events (150+ guests), add a fourth person managing the line and directing traffic.
Step 2: Establish Communication Protocols
Use simple hand signals or quick verbal checks: "Order up" when a drink is ready, "Restock milk" when supplies run low, "Break time in 10" to coordinate rotations. Establish signals before service begins.
Step 3: Manage Guest Flow
Position your service station to create a natural queue. Use rope barriers or signage to direct guests into a single line. For high-volume events, consider an "order here, pick up there" model: guests order at one station, then retrieve completed drinks at a pickup window.
Step 4: Monitor Service Times
Track how long guests wait from order to drink in hand. If waits exceed 5 minutes, your operation is too slow. Adjust by simplifying the menu, pre-batching drinks, or adding staff.
Step 5: Plan Staff Breaks
For events longer than 2 hours, schedule 15-minute breaks for your team. Tired staff make mistakes and deliver poor service. Rotate breaks so service never stops.
Guest flow is determined by your slowest operation. Identify what slows service, then optimize that step first.
7. Conduct a Thorough Venue Site Inspection and Load-In Planning
Venue site inspections prevent surprises on event day. A proper inspection happens 1-2 weeks before the event. Walk the entire venue with a checklist and camera.
Step 1: Assess Power Availability
Locate electrical outlets near your service area. Test them with a power meter to confirm amperage. Identify the electrical panel location. Measure the distance from the outlet to your cart. Check outlet condition and ask the venue about generator restrictions.
Step 2: Evaluate Site Layout and Accessibility
Identify your setup location. Is it flat or sloped? Measure the space: does your cart fit? Can you access it for load-in and load-out? Identify where guests will queue and whether there’s adequate space.
Step 3: Check Weather Exposure
Is your setup location exposed to wind? Shaded or open? Note sun direction and identify potential water drainage issues.
Step 4: Verify Sanitation Access
Locate bathrooms for hand washing. Identify trash disposal locations and ask about waste management requirements.
Step 5: Plan Load-In and Load-Out Routes
Trace the path from your vehicle to your setup location. Measure doorways, hallways, and gates to confirm your cart fits. Identify the nearest parking location. For high-rise venues, confirm loading dock access and elevator size. Document everything with photos.
Step 6: Confirm Electrical and Water Logistics
If your setup requires water, identify the nearest water source. For electrical, confirm outlet location is suitable for your equipment placement.
Step 7: Establish Communication with Venue Staff
Identify the day-of contact person and get their phone number. Confirm setup time, service hours, and breakdown time. Ask about venue-specific requirements and clarify who’s responsible for setup assistance.
Document your findings in a written site report with photos and measurements. Share this with your team before event day.
Confirm critical details (power availability, access routes, setup time) by phone 2-3 days before the event. Don’t assume what you were told weeks ago is still accurate.
Conclusion
Improving your catering setup at outdoor events requires attention to logistics, safety, and operational efficiency. Master your mobile coffee cart power requirements by calculating electrical load and securing appropriate power sources. Plan for weather contingencies with proper tent coverage and heat management. Implement food safety protocols that protect guests and your business. Design menus around drinks that travel well. Assemble comprehensive equipment checklists and test everything before load-in. Optimize staff coordination and guest flow through clear roles and communication. Conduct thorough venue inspections that eliminate surprises.
These seven strategies transform outdoor catering from chaotic improvisation into reliable, professional service. When you handle logistics correctly, your team focuses on delivering excellent drinks and memorable experiences.
Colada Kulture Co. specializes in mobile coffee cart catering that handles these logistics seamlessly. Our professional baristas, customizable menus, and equipment designed for outdoor service ensure your event runs smoothly regardless of venue challenges. Request a quote to discuss how we can elevate your next event.
Frequently Asked Questions
What are the most important logistics for outdoor catering?
The core logistics are power supply (15-amp outlet or portable generator), weather protection (tent or canopy), food temperature control (insulated carriers and refrigeration units), sanitation stations, waste disposal, staff coordination, and guest flow management. A thorough venue site inspection before the event catches issues like limited electrical access or uneven ground that could disrupt service. Colada Kulture's mobile coffee trailers include built-in generators, eliminating one major logistics hurdle for outdoor events.
How do you keep food safe during outdoor catering events?
Follow the FDA Food Safety Modernization Act guidelines: keep hot foods above 135°F and cold foods below 41°F using insulated carriers, chafing dishes, or portable refrigeration. Set up hand-washing stations with soap and paper towels at least 20 feet from food prep areas. Prevent cross-contamination by using separate utensils and cutting boards for different food types. Monitor food temperatures with a thermometer, and discard any food left in the temperature danger zone (41°F-135°F) for more than two hours. Outdoor catering food safety standards also require pest control measures and covered food displays.
What equipment is essential for a mobile coffee cart setup?
Essential event catering equipment includes an espresso machine, grinder, water heating system, insulated beverage dispensers, portable serving stations, chafing dishes for food items, insulated carriers for transport, hand-washing stations, waste disposal bins, and weather protection (tent or canopy). For power, you'll need either a dedicated 15-amp outlet or a portable generator, Colada Kulture's trailers come equipped with a Predator 9500 quiet generator. Don't forget serving supplies: cups, lids, napkins, stirrers, and branded materials for a professional presentation.
How do you manage power requirements for outdoor catering equipment?
Confirm the venue's electrical capacity before booking. A mobile coffee cart typically requires a dedicated 15-amp outlet, though some equipment may need 20 amps. If the venue lacks adequate power, rent a portable generator (5000-9000 watts for most catering setups) or choose a mobile coffee trailer with an onboard generator. PulseTrek mobile power stations offer silent, emission-free alternatives for venues that restrict diesel generators. Always test power connections on-site during your venue inspection, and bring extension cords rated for outdoor use.
This article was written using GrandRanker